
If you’ve ever looked at those lush, Pinterest-perfect vertical garden walls and thought, “That’s beautiful… but I could never build that,” you’re not alone.
Here’s the truth: you absolutely can.
You don’t need advanced tools. You don’t need carpentry skills. And you definitely don’t need a big budget.
With a few simple materials, a bit of planning, and a beginner-friendly approach, you can transform a blank wall into a thriving green feature—whether it’s on a balcony, backyard fence, or even indoors.
This guide walks you through everything step-by-step, with simple diagrams, easy methods, and common mistakes to avoid.
Why Build a Vertical Garden Wall?
Before we get into the “how,” let’s talk about the “why.”
Vertical gardens are exploding in popularity—and for good reason:
- They save space (perfect for small homes, apartments, and balconies)
- They look stunning (instant aesthetic upgrade)
- They improve air quality
- They make gardening easier (less bending, fewer weeds)
- You can grow herbs, veggies, flowers, or even decorative plants
And best of all? You can build one in a weekend.
Step 1: Choose the Right Location
This is where most beginners go wrong. Your wall location matters more than your tools.
What to Look For:
- Sunlight
- 6–8 hours → Great for vegetables and herbs
- 3–5 hours → Perfect for leafy greens and many flowers
- Low light → Choose shade-loving plants
- Wall Type
- Fence ✔️ (easiest)
- Balcony railing ✔️
- Outdoor wall ✔️
- Indoor wall ✔️ (with proper drainage)
- Water Access
- Nearby tap = easier maintenance
- Otherwise, you’ll be carrying water often
Simple Layout Diagram
Side View of Vertical Garden

   ☀️ Sunlight
      ↓
  [ Plants ]
  [ Planter ]
  [ Planter ]
  [ Planter ]
  [ Support Frame ]
  [ Wall / Fence ]
Step 2: Pick the Easiest Structure (Beginner Options)
Forget complex systems. Start with something simple.
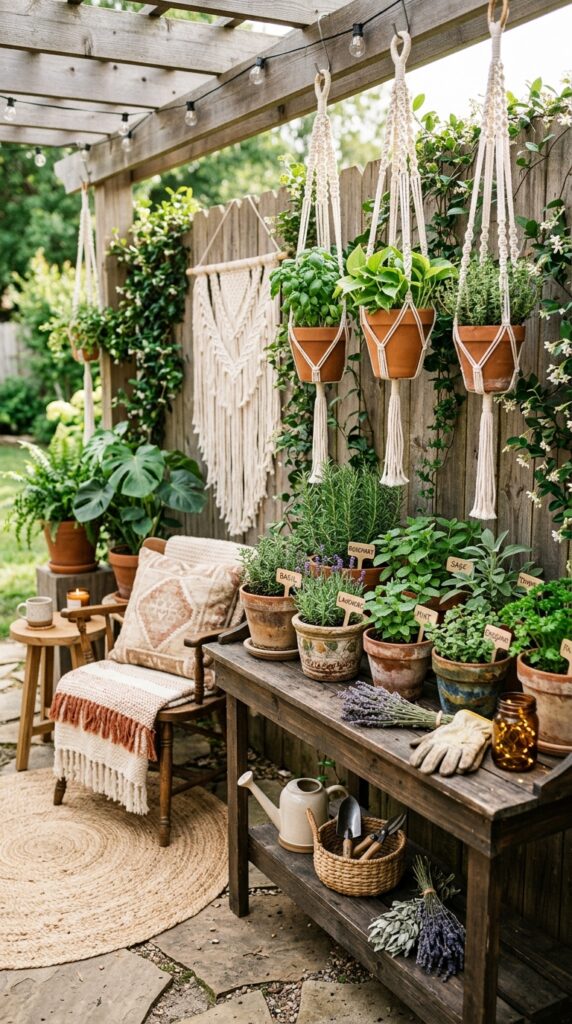
Option 1: Hanging Planters (Easiest)
- Uses hooks, nails, or railing hangers
- No construction needed
Best for: renters, beginners, small spaces
Option 2: Wooden Pallet Garden
- Repurpose a pallet
- Add fabric or pots
Best for: budget DIY lovers
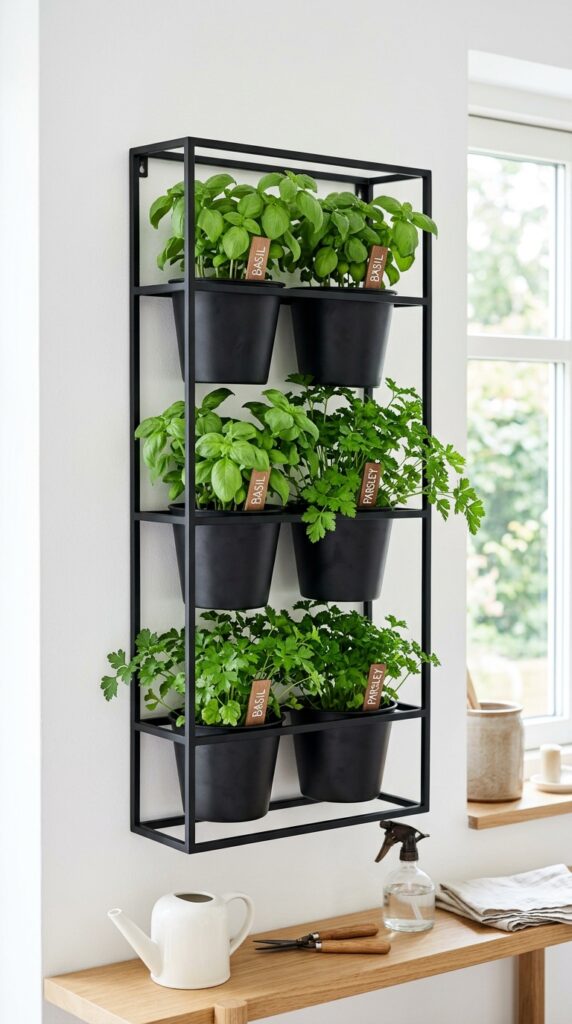
Option 3: Modular Wall Planters
- Pre-made systems you attach to a wall
- Snap-in pots or trays
Best for: clean, modern look
Option 4: Vertical Pocket Fabric Planters
- Hanging fabric with plant pockets
Best for: herbs and flowers
Step 3: Gather Basic Materials
Keep it simple. Here’s a beginner-friendly list:
Essentials
- Planters (pots, pockets, or containers)
- Screws or hooks
- Drill (or hammer + nails)
- Measuring tape
- Level (optional but helpful)

Optional (but useful)
- Waterproof backing (plastic sheet)
- Wood frame or pallet
- Zip ties (great for quick fixes)
- Gardening gloves
Step 4: Build the Frame (Simple Method)
Let’s walk through a super beginner-friendly setup using a wooden frame.
Basic Structure Diagram
Front View

|-------------------|
|   [ Plant Pot ]   |
|   [ Plant Pot ]   |
|   [ Plant Pot ]   |
|   [ Plant Pot ]   |
|-------------------|

Back View

Wall
 ||
 ||   ← Screws
[Frame]
Easy Steps:
- Measure your space
- Decide width and height
- Attach support frame (optional)
- Use wooden slats or pallet
- Screw into wall or fence
- Add planters
- Hook them
- Screw them
- Or hang using zip ties
- Check stability
- Gently pull to ensure everything is secure
Step 5: Add Soil & Plants
Now comes the fun part.
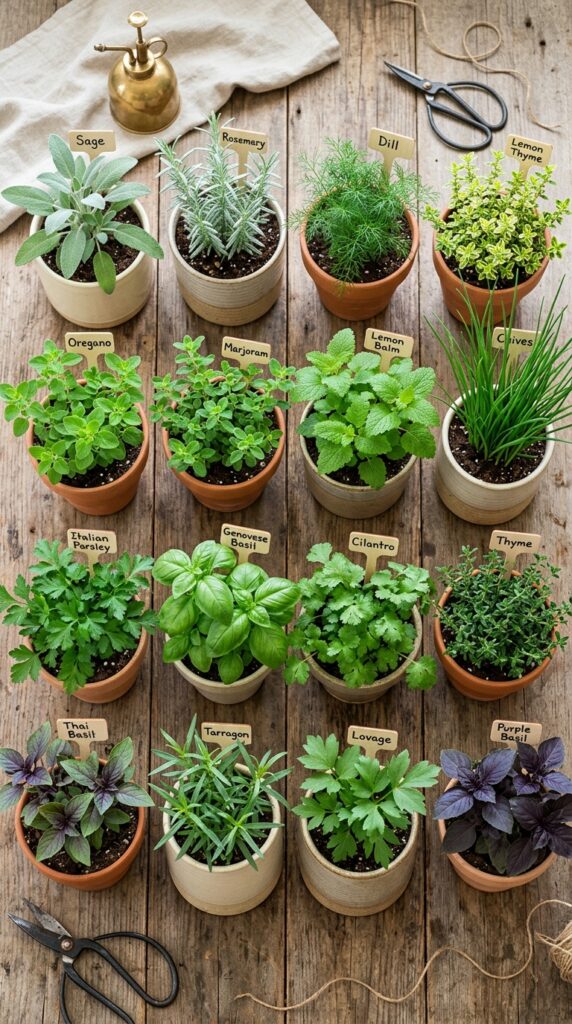
Best Plants for Beginners
🌿 Herbs
- Basil
- Mint
- Parsley
- Thyme
🥬 Vegetables
- Lettuce
- Spinach
- Cherry tomatoes
🌸 Flowers
- Petunias
- Marigolds
- Pansies
🌱 Low-Maintenance Plants
- Pothos
- Ferns
- Succulents
Planting Tip
Use lightweight potting mix, not garden soil.
Why?
- Better drainage
- Less weight on the wall
- Healthier roots
Step 6: Watering System (Keep It Simple)
You don’t need an automatic irrigation system.
Beginner Watering Methods
1. Hand Watering
- Use a watering can
- Start from the top → water flows down
2. Bottle Drip Hack
   Bottle
     ↓
   (slow drip)
     ↓
Plant- Poke small holes in a plastic bottle
- Fill with water
- Place upside down in soil
3. Self-Watering Planters (Optional Upgrade)
Step 7: Drainage Setup (Important!)
Water needs somewhere to go.
Simple Drainage Setup
- Ensure pots have holes
- Add tray or gravel layer
- For indoor walls:
- Add plastic backing
- Use catch trays
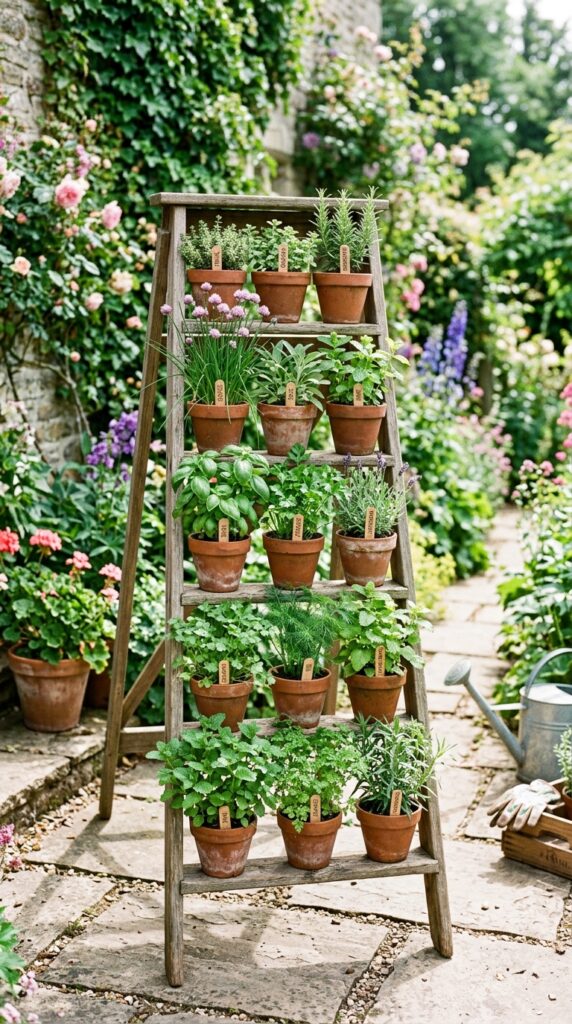
Step 8: Arrange Plants Like a Pro
Placement matters more than you think.
Smart Layout Strategy
Top Row:     Sun-loving plants 🌞
Middle Row:  Medium-light plants 🌤
Bottom Row:  Shade-tolerant plants 🌿
Visual Balance Tips
- Mix colors (green + flowers)
- Combine textures (leaf shapes)
- Avoid overcrowding
Common Mistakes to Avoid (Very Important)
1. Overwatering
Biggest beginner mistake.
Fix:
- Check soil before watering
- Use well-draining pots
2. Choosing the Wrong Plants
Not all plants thrive vertically.
Avoid:
- Deep-root plants (like carrots)
- Large heavy plants
3. Ignoring Weight Limits
Water + soil = heavy.
Fix:
- Use lightweight materials
- Secure frame properly
4. Poor Sunlight Planning
Plants won’t grow if they don’t get enough light.
Fix:
- Observe sunlight before building
5. No Drainage Plan
This can damage walls and kill plants.
Fix:
- Always include drainage holes and catch systems
6. Overcomplicating the Design
You don’t need a fancy system.
Truth: simple setups work best.
Budget-Friendly Vertical Garden Ideas
You don’t need to spend much.
Under $20 Setup
- Plastic bottles → free planters
- Wooden pallet → often free
- Zip ties + hooks → cheap
- Basic soil + herbs
Recycled Materials You Can Use
- Old shoe organizers
- Tin cans
- Plastic containers
- Wooden crates
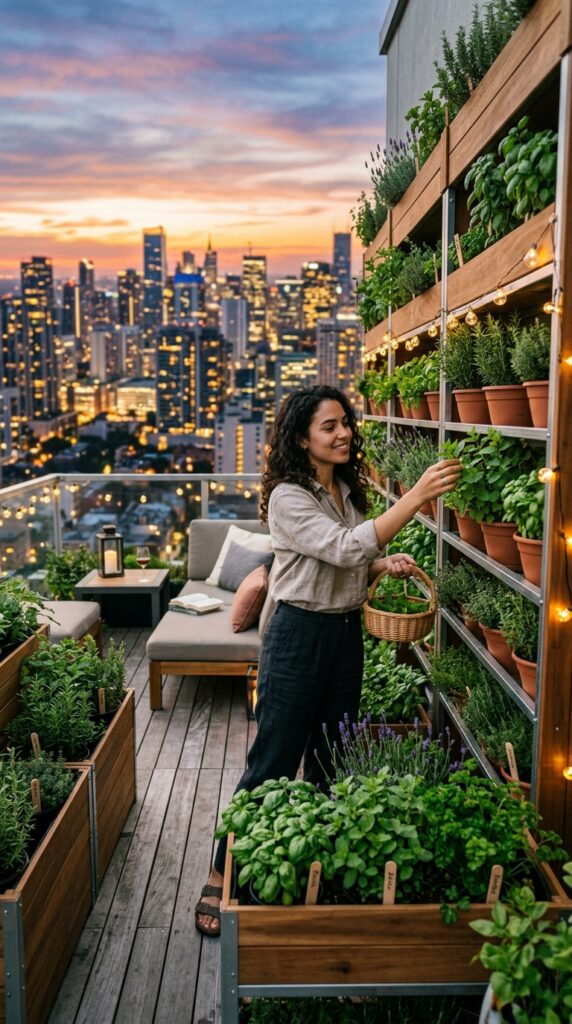
Indoor Vertical Garden Tips
Yes—you can build one inside your home.
What You Need:
- Bright window or grow light
- Waterproof backing
- Drip trays
Best Indoor Plants
- Pothos
- Snake plant
- Herbs like basil and mint
Maintenance Made Easy
Once your garden is up, maintenance is simple.
Weekly Checklist
- Water plants
- Check for pests
- Trim dead leaves
Monthly Checklist
- Add fertilizer
- Reposition plants if needed
- Tighten any loose fixtures
Beginner-Friendly Vertical Garden Plan (Step-by-Step Recap)
If you want a super simple plan, follow this:
- Choose a sunny wall or balcony
- Buy 6–10 small pots
- Attach hooks or a small frame
- Hang or secure pots
- Fill with potting soil
- Plant herbs or flowers
- Water gently
- Enjoy your garden
Quick Visual Setup Example
Balcony Vertical Garden

| Railing |
|  🌿 🌸 🌿 |
|  🌱 🌿 🌸 |
|  🌿 🌱 🌿 |

Hooks + Hanging Pots
How Long Does It Take?
- Setup: 2–4 hours
- Plant growth: 2–6 weeks
- Full lush look: 1–2 months
Final Thoughts
Building a vertical garden wall isn’t about perfection—it’s about starting.
You don’t need to be “handy.” You don’t need expensive tools. And you don’t need a huge space.
What you do need is a simple plan and the confidence to try.
Start small. Keep it simple. Learn as you go.
Before you know it, that empty wall will turn into a living, breathing piece of art.